igual
Super Member
     Guide Maker
Joined:July 2014
Posts: 3,402 
Location:
Likes: 2,874
Recent Posts
Last Online Jun 26, 2017 16:25:16 GMT
|
Post by igual on Dec 12, 2014 22:34:02 GMT
How to recoil a Kanger Protank head + make a Microcoil.
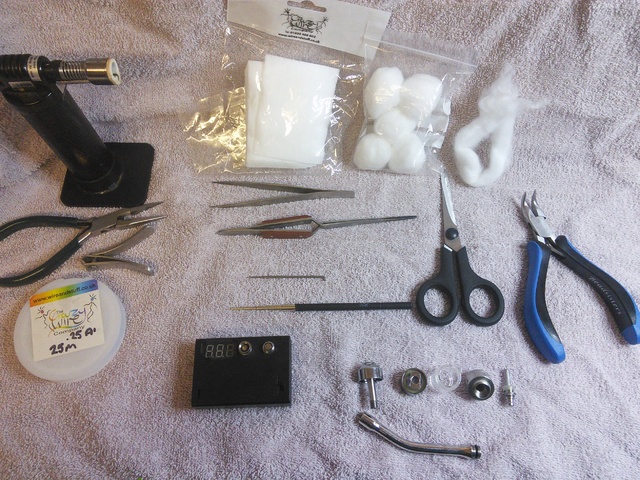
Tools:
Tweezers
Scissors
Wire clippers or Nail clippers
Lighter or blowtorch
Screwdriver / drill bit / mandrel. ( for this I am using a 1.5mm mandrel) found here www.ebay.co.uk/itm/Beadsmith-2-Piece-5-step-Wire-Winder-Loops-Craft-Mandrel-Set-1-5mm-10mm-/361043583204?pt=UK_Crafts_JewelleryMaking_GL&hash=item540fdfe0e4
Kanthal I am using 0.25mm purchased from here www.vape-atomizer-mesh.com/products/kanthal-A1-heat-resistance-wire-025mm-20metre-2378.html
Organic cotton / rayon / japanese cotton pads
Ohm meter or device that will read ohms
Something to vape on!
Please wash your Atty and dry before starting and clean your hands and work area.
Here is my setup.
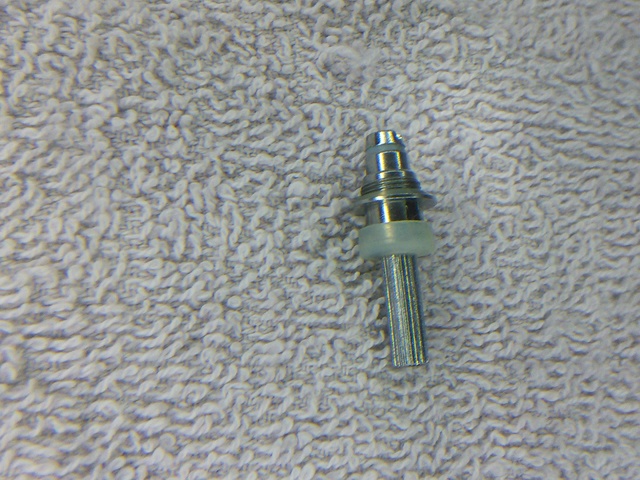
First start by disassembling the atomiser head.
Wobble top post off, pull bottom pin out, gently pull bottom silicone insulator out, lift old coil out.
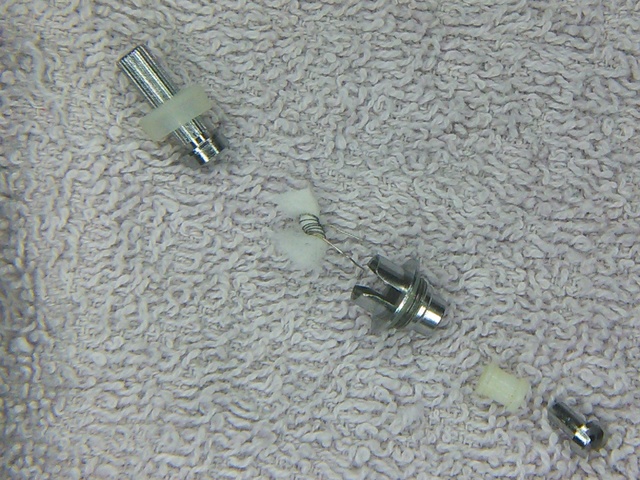
Safely discard of old coil and wick, carefully wash and dry coil post, topcap, body, insulator , pin.
Make sure not to loose down plughole.
What you should be left with is an empty clean coil head.
Cut a length of 0.25mm kanthal approximate 10 cm long.
You ideally need to heat the wire to orange heat using either a lighter,blowtorch,gas cooker.
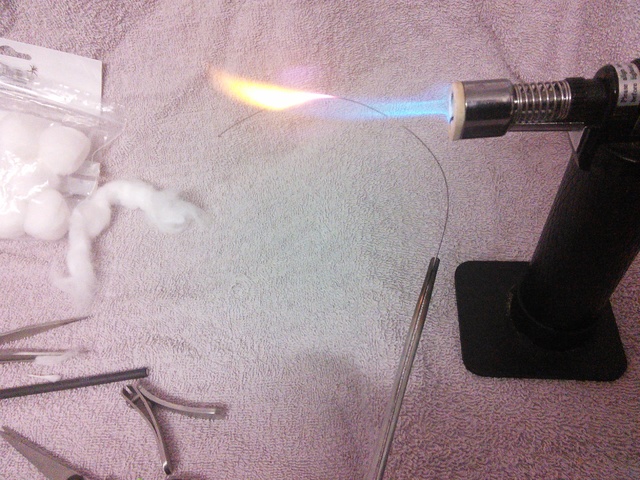 Give the wire a few seconds to cool down then with clean hands start to wrap your coil. Give the wire a few seconds to cool down then with clean hands start to wrap your coil.
I will be using the 1.5mm od mandrel linked at start of tutorial.
Leave a 25mm (1 inch) tail and hold firmly on mandrel like so.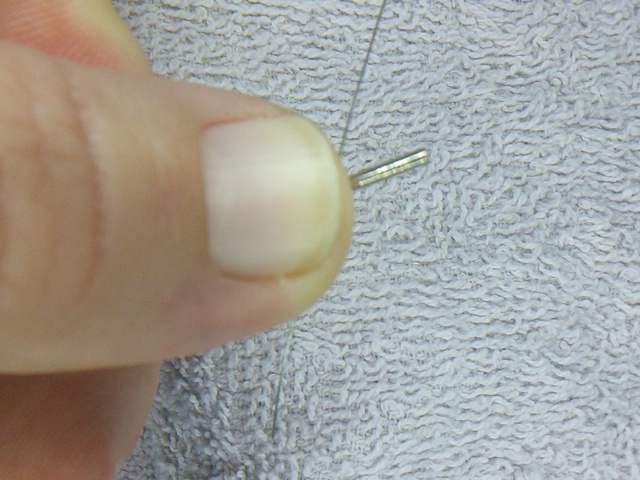 Proceed with wrapping the wire round the mandrel keeping the wire as close together as possible, make sure to not overlap any I have used 7 wraps. Proceed with wrapping the wire round the mandrel keeping the wire as close together as possible, make sure to not overlap any I have used 7 wraps.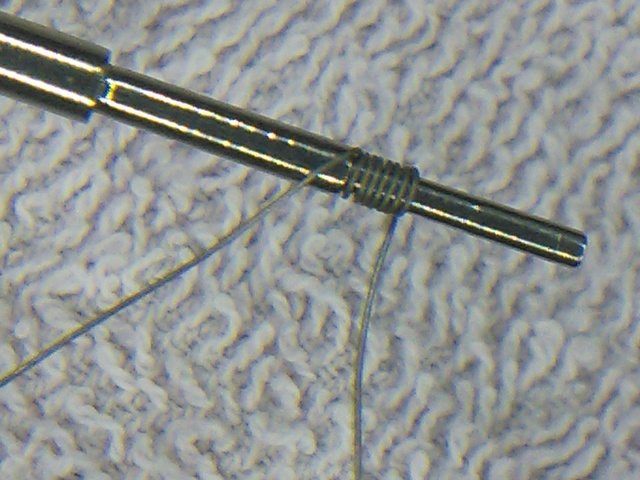 Slide coil of turn it around and slide back on to mandrel and pull both legs tightly whilst pushing gently to tighten/neaten coil up. Slide coil of turn it around and slide back on to mandrel and pull both legs tightly whilst pushing gently to tighten/neaten coil up.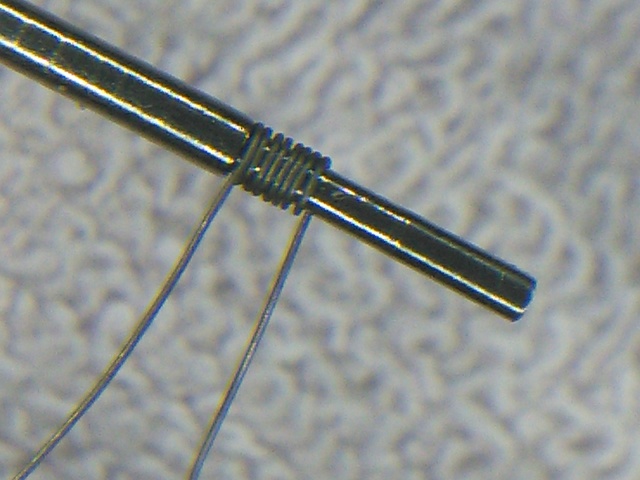 Clip the longest leg so they are manageable size at leat an inch long with one leg longer than the other ideally. Clip the longest leg so they are manageable size at leat an inch long with one leg longer than the other ideally.
And remove from mandrel.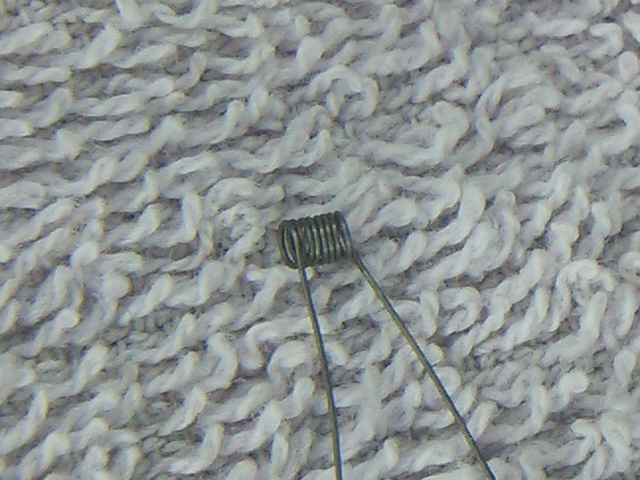
Gently place your coil in your ceramic,heatproof tweezers ( if using pliers be careful not to crush it) Heat with your lighter,blowtorch,gas cooker, fire breathing skills, until its a nice even orange for 5 seconds. Heat with your lighter,blowtorch,gas cooker, fire breathing skills, until its a nice even orange for 5 seconds.
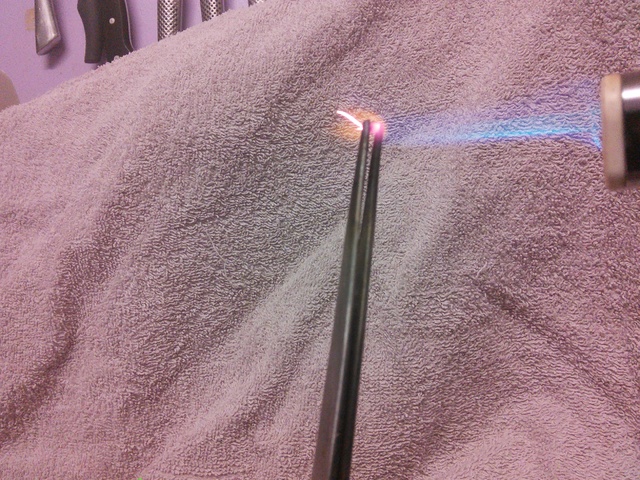 Put this someplace to cool for at least 1 minute ( remember your tools will be bloody hot so put them on a heatproof surface not on wife's best tablecloth) Put this someplace to cool for at least 1 minute ( remember your tools will be bloody hot so put them on a heatproof surface not on wife's best tablecloth)
What you should end up with is a microcoil.
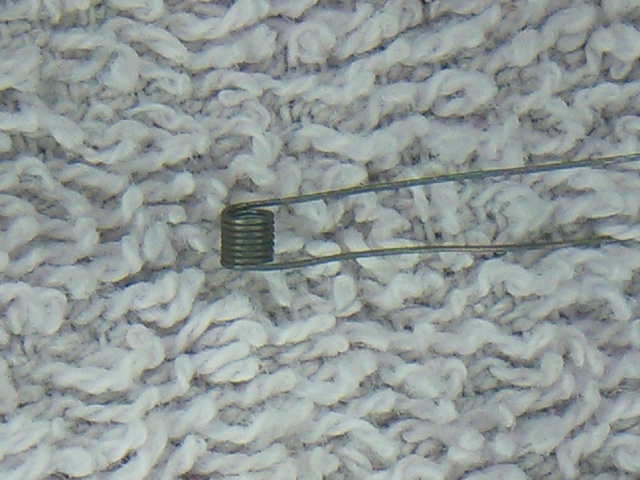
Take your mandrel and thread coil back on to it, the reason we leave one leg longer is so its easier to slot into the atomiser body like so. Keeping everything tight bend one leg down like this and thread the silicone insulator on to the other Keeping everything tight bend one leg down like this and thread the silicone insulator on to the other Push the insulator into place ( tweezers can help if you have sausages for fingers like me) Push the insulator into place ( tweezers can help if you have sausages for fingers like me)
Then pull the wires tight and bend it over whilst keeping it under tension.
Push in the positive pin.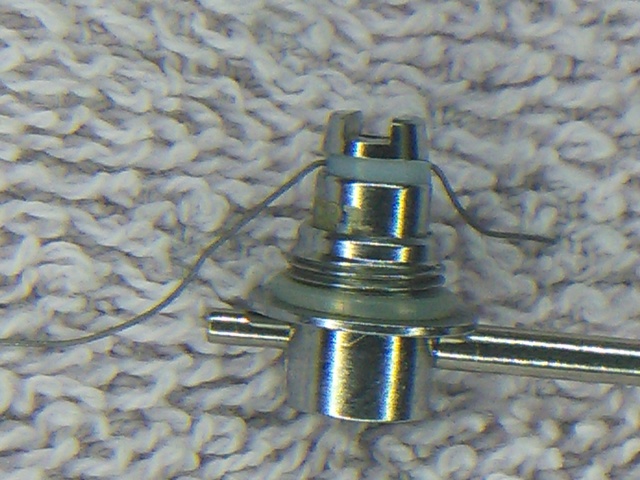 Still keeping your mandrel in place wiggle,snip,clip the wires flush to the body ( DO NOT DROP THE SMALL BITS ON THE FLOOR AS THEY HURT LIKE HECK WHEN YOU STAND ON THEM). Still keeping your mandrel in place wiggle,snip,clip the wires flush to the body ( DO NOT DROP THE SMALL BITS ON THE FLOOR AS THEY HURT LIKE HECK WHEN YOU STAND ON THEM).
Gently remove mandrel and you should have this .
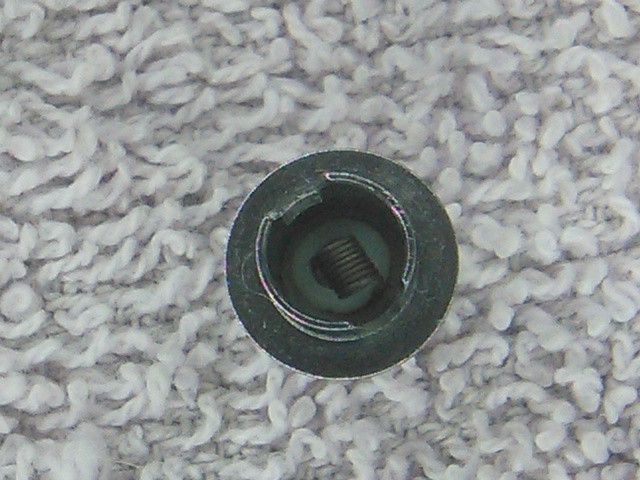 If your coil is off centre slightly you can gently prod it with tweezers to centre it ( if coil is twisted so holes are not in alignment with slots go drink tea/coffee/scotch and try again). If your coil is off centre slightly you can gently prod it with tweezers to centre it ( if coil is twisted so holes are not in alignment with slots go drink tea/coffee/scotch and try again).
Screw the head into your Protank base.
And put onto your ohms checker/device that checks ohms vamo,istick,MVP. Etc.
This should give you a reading of 1.6 if you have used same wire,wraps,mandrel size.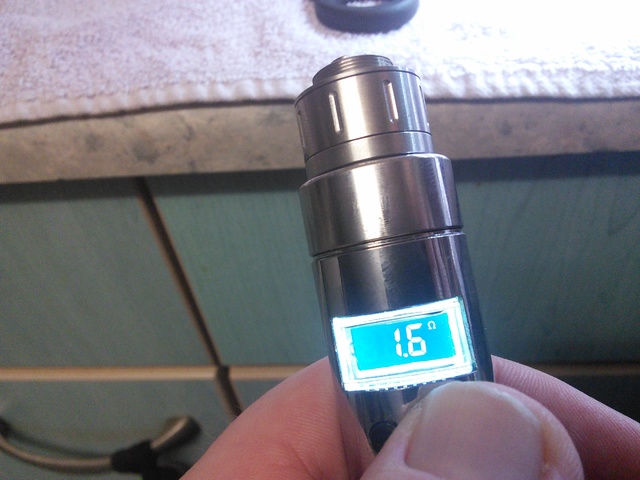 If all is well attatch to your device and dry fire coil for a second or 2 this should glow from middle to outside maintain a uniform colour with no bright yellow/white areas ( hot spots) if you have these you can try gently heating coil release button and squeeze coil with tweezers to reshape it. If all is well attatch to your device and dry fire coil for a second or 2 this should glow from middle to outside maintain a uniform colour with no bright yellow/white areas ( hot spots) if you have these you can try gently heating coil release button and squeeze coil with tweezers to reshape it.
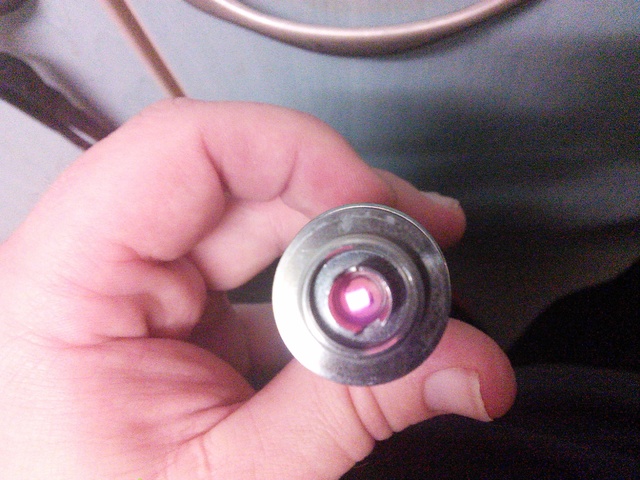 Leave for 20 seconds to cool down then unscrew base from device and unscrew head from base. Leave for 20 seconds to cool down then unscrew base from device and unscrew head from base.
Depending upon what wicking material you choose be it organic cotton wool, rayon or jap cotton pad.
The process from here is pretty much the same I will use jap cotton pad as its my preferred wick for Protank style atomisers.
But I will also show you the size bits needed if using cotton wool or rayon.
Take a cotton pad and split it in half
 Cut a 3 mm strip of the long side and then cut that strip into 2 ( this is enough for 2 wicks) Cut a 3 mm strip of the long side and then cut that strip into 2 ( this is enough for 2 wicks) 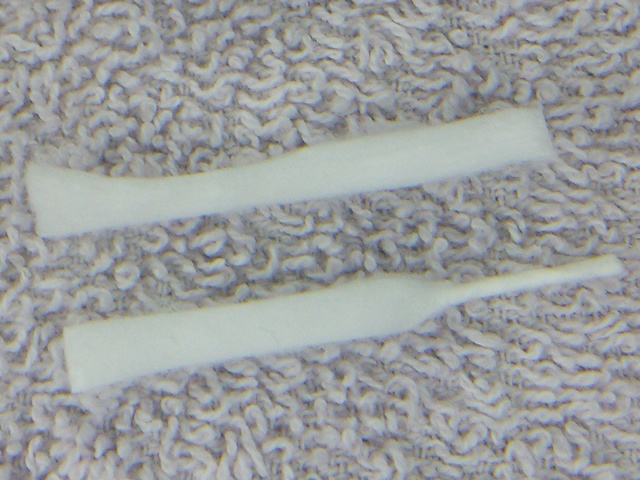 Put one bit away with the rest of your pads and tightly twist a point in the end of the other piece. Put one bit away with the rest of your pads and tightly twist a point in the end of the other piece.
Then thread that point through your coil, ( sometimes cutting the tip off the point helps)
Tweezers can be helpful here.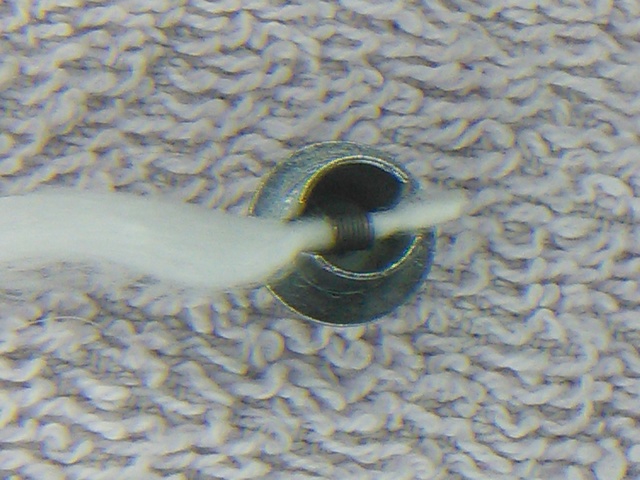 Gently tease/pull the wick through ( there should be some slight resistance but not much if the coil moves you have to much wick this applys to both cotton and rayon as well ) Gently tease/pull the wick through ( there should be some slight resistance but not much if the coil moves you have to much wick this applys to both cotton and rayon as well )
Now it should look like this. 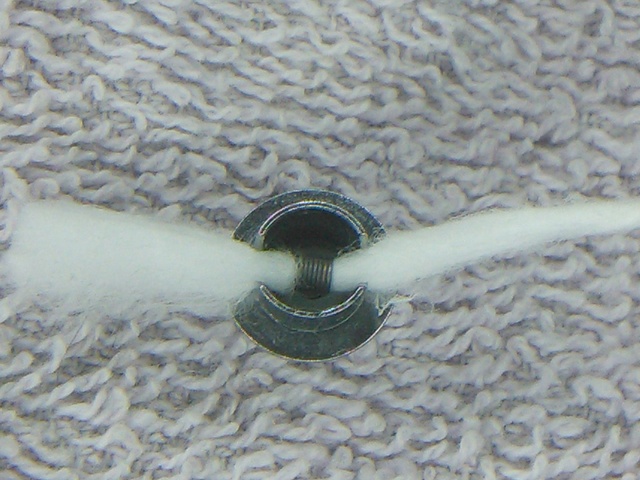 Trim the wick up. Trim the wick up.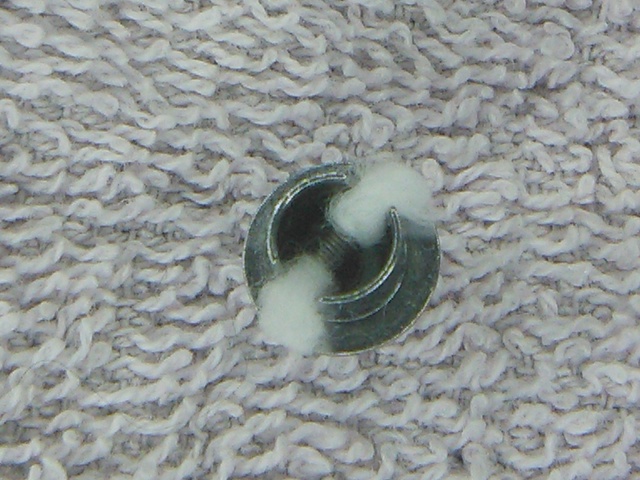 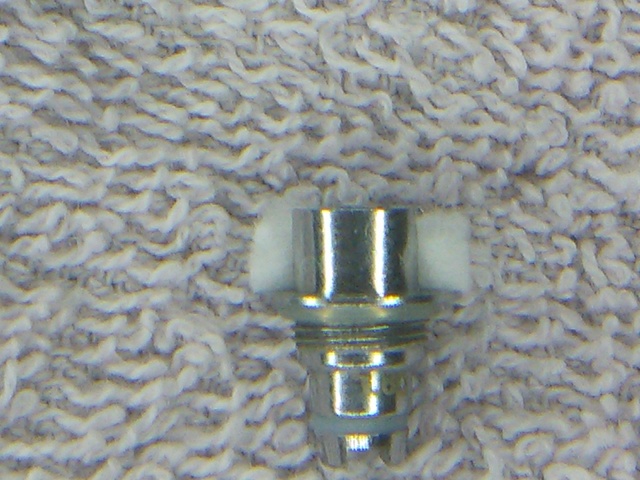
If you are making a batch up not to be used immediately:
Re-attach top post and rubber topcap. Screw back into your Protank base and recheck ohms. ( DO NOT FIRE IT)
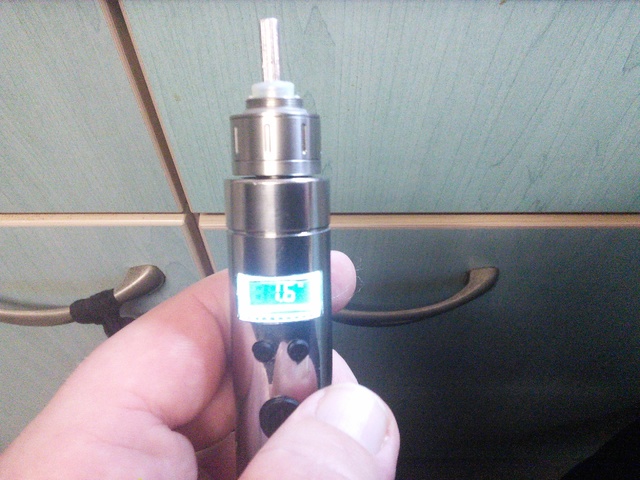 If you are using it straight away screw Atty head into Protank base then apply a few drops of juice to wick and coil re attach top post and top cap grommet then check ohms. If you are using it straight away screw Atty head into Protank base then apply a few drops of juice to wick and coil re attach top post and top cap grommet then check ohms.
Assuming all is well re assemble your tank. Fill her up and have a vape after a minute or 2 to let the wick take up the juice.
Amount of wick needed for rayon and cotton are slightly different cotton wool likes to be able to slide through coil with virtually no resistance.
Rayon likes to be a little tighter.
With all wicking materials they will vary batch to batch manufacturer to manufacturer.
There is a little trial and tribulation with getting the perfect wick.
I hope this guide is of help
All the best
Martin
Aka igual.
|
|


