bobby00
Full Member
  
Joined:June 2017
Posts: 119 
Location:
Likes: 61
Recent Posts
Last Online Jun 15, 2019 16:25:33 GMT
|
Post by bobby00 on Jul 12, 2017 22:34:58 GMT
Bought kayfun lite and it came with a coil wrapped around silica already installed? so tested on ohm reader 1.7 ohms filled with juice and it tastes like crap? It is a fasttech one? also its a very hard draw I mean really I don't want clouds but was told these were good for taste but this is hard teeny weeny little air hole? Can you drill it to make it more airy? www.fasttech.com/p/1692500 Here's the little bleeder I mean love? any help grateful |
|
phtumshk
Super Member
    
Joined:May 2014
Posts: 3,758 
Location:
Likes: 4,058
Recent Posts
Last Online Nov 15, 2024 13:54:05 GMT
|
Post by phtumshk on Jul 12, 2017 22:53:58 GMT
Yep there a bit tight by todays standards.
You can drill them out but your still restricted by the tiny air hole in the deck.
As with most cheap clones they need a damn good washing before use.
|
|
Postmodern Smoking
Super Member
     Personal Mix Solver
( Dave )
Joined:October 2012
Posts: 7,148
Location:
Likes: 9,833
Recent Posts
Last Online Nov 22, 2024 18:24:59 GMT
|
Post by Postmodern Smoking on Jul 12, 2017 22:56:56 GMT
bobby00 , Firstly did you thoroughly wash all the parts in warm/hot soapy water, rinse and dry? It may still have traces (or more than traces!) of machining oil from production. Secondly, the coils supplied with clones are usually crap.... better making one yourself. Third checkout / search for vids on how to wick a Kayfun on youtube. [ETA] Ninja'd by phtumshk re. cleaning !
|
|
phtumshk
Super Member
    
Joined:May 2014
Posts: 3,758 
Location:
Likes: 4,058
Recent Posts
Last Online Nov 15, 2024 13:54:05 GMT
|
Post by phtumshk on Jul 12, 2017 22:58:41 GMT
Just looked at mine, drilled out to 2mm you can get a very restricted lung hit out of it.
|
|
DaveJ
Super Member
     Wood Wizard of Oz
Locked down at home.
Joined:September 2016
Posts: 1,723 
Location:
Likes: 2,738
Recent Posts
Last Online Oct 31, 2024 3:07:26 GMT
|
Post by DaveJ on Jul 13, 2017 6:24:35 GMT
Ahhh bobby00 - old school Kayfuns. Love 'em. This is to add to what others have already said before in this thread. First - silica wicks *shudder* horrid. Ditch it. Second - as has been said, tear it down to it's individual parts and ensure it's clean. Properly clean. Soak in dish washing liquid using lots of hot water. Ensure it can soak and properly remove any oils and whatever that may remain from manufacturing. Rinse fully. When I say tear it down, I mean remove every bolt, screw and o ring - taking note of how it comes apart so you can rebuild it. Pics along the way might be a good idea. Dry everything carefully. I blast everything dry with huge volumes of air from my shed compressor - some say sitting the parts over their computer's cooling fans helps. Whatever way works for you - but properly dry all the parts. Re-assemble and when doing so I apply a little VG to every O-Ring to help lubricate them. It makes assembly easier and also helps then "slide" rather than pinch when assembling. NOW - that very tight air intake. There are TWO points of restriction in the Kayfun base: the center vertical brown (brass?) tube - the one that screws out from the center of the 510 connector in the base and extends right up to immediately under the coil. That has a center hole which is about 1.5 to 1.7 mm in diameter. LEAVE IT ALONE. The second point of restriction is in the side of the base - the one on the side of this pic (lifted from FT)  This is the hole that can vary in size depending on who made your Kayfun. Some are as small as 1.2 mm or so - and restrict things way too far for me. This is the one you should drill out if you want to "ease" your Kayfun's draw. To do so, ensure you have fully disassembled your Kayfun base. Removed the 510/center pole (the center slot screw in the middle of the 510 connector shown below) AND ALSO the smaller of the two screws in the base immediately adjacent to the 510 connector as shown in the (stolen from FT) pic below - AND loose that small screw, it only will cause grief.  Once that base is ready to go, set up your drill press and use a 1.8 to 2.00 mm drill bit to increase the size of that air hole on the side. Of course, normal drilling rules apply: lubricate the bit, take it easy, proper clamps and so on. You are only going from the outside of the base to the center not all the way from one side to the other - you'll feel it "break thro" into the center. Clean everything properly after drilling (you do not want any metal shavings remaining), then reassemble. That'll ease up the draw majorly. Some also go as far as drilling that center post (under the coil) but that is fraught with danger - and I find it unnecessary. That covers easing the air draw. Wicking is another issue. Those juice channels in the base are small and may well choke off your juice (dry hits) especially if you use VG heavy juice. I attacked mine with a dremel. Sample before and after pics here. Not real pretty but these now wick max VG juice at 20 watts:   Coils - I suggest to start 28 gauge. Use 7 or 8 wraps around a 2.5 mm mandrel which will work out to around 1.3 to 1.6 ohms. That'll be a sweet, satisfying and very battery friendly vape at somewhere around 14 to 18 or so watts. Else - an RTA that vapes well without all that futzing around is the Doggy Style clones from FT. Two versions are available: a) the SXK version - the tighter draw of the two here: linky (the draw is about on a par or just so slightly looser than the above Kayfun AFTER the side air hole has been drilled). I have this one. or b) the SJMY version here: linky Reviews say this has a looser draw than the SXK version. I've not tried this one. Good luck with it....  |
|
|
|
Post by domesticextremist on Jul 13, 2017 7:16:01 GMT
AIUI the airflow control screw (beneath the centre post) is shipped fully closed. Try opening it up and see.
|
|
bobby00
Full Member
  
Joined:June 2017
Posts: 119 
Location:
Likes: 61
Recent Posts
Last Online Jun 15, 2019 16:25:33 GMT
|
Post by bobby00 on Jul 13, 2017 8:31:52 GMT
Thank you DaveJ for takiningthe time to answer, and all the work you did Thanks.
I did wash it a bit but not enough duh also setting up drill press right now gonna drill the sucker.
I only have the fill screw on the base of mine so Cannot loose airflow anymore than is until drilled domesticextremist?
I will report on success or failure cheers all
|
|
DaveJ
Super Member
     Wood Wizard of Oz
Locked down at home.
Joined:September 2016
Posts: 1,723 
Location:
Likes: 2,738
Recent Posts
Last Online Oct 31, 2024 3:07:26 GMT
|
Post by DaveJ on Jul 13, 2017 8:43:09 GMT
Thank you DaveJ for takiningthe time to answer, and all the work you did Thanks. You are welcome. ... I only have the fill screw on the base of mine so Cannot loose airflow anymore than is until drilled domesticextremist? Ah... there are different versions of those early Kayfuns - Kayfun Lite, Lite Plus etc. One of 'em didn't have the "adjustment" grub screw in the bottom of the base .... BUT I sorta thought they had a funny side of the base variant?? Not quite sure. No matter. Just ensure, before you drill, nothing protrudes into that air hole/path... those grub screws are harder than your bit and will cause your bit to break off ... leaving the broken part of your bit embedded permanently in your kayfun base. You do not need to ask how I know this!  Hope it goes well! *fingers crossed* |
|
phtumshk
Super Member
    
Joined:May 2014
Posts: 3,758 
Location:
Likes: 4,058
Recent Posts
Last Online Nov 15, 2024 13:54:05 GMT
|
Post by phtumshk on Jul 13, 2017 11:15:32 GMT
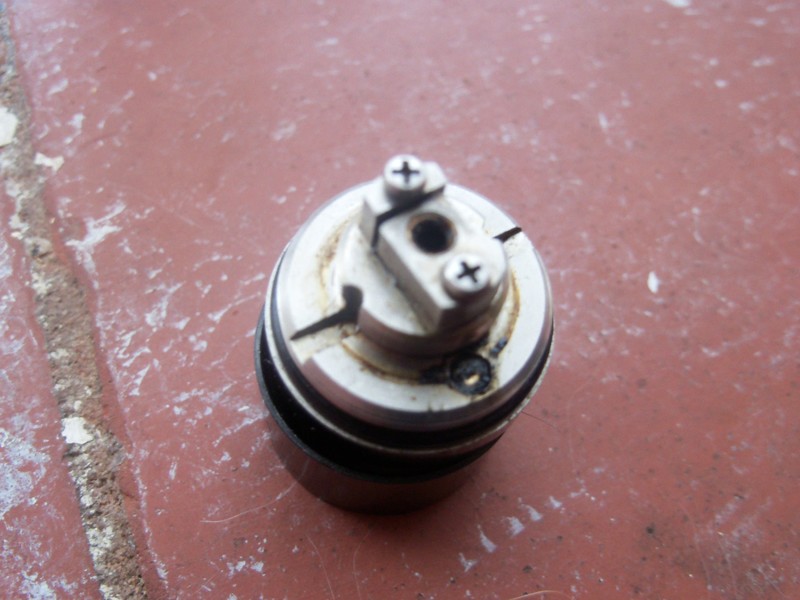
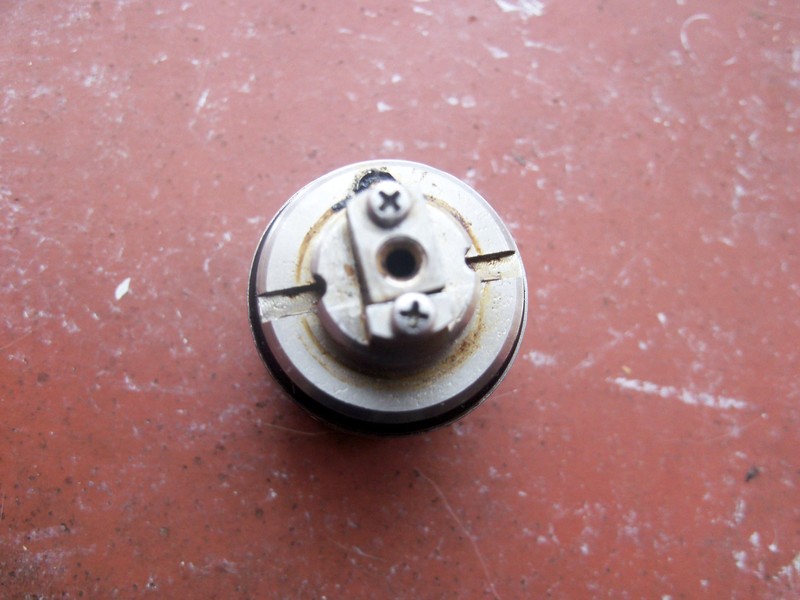
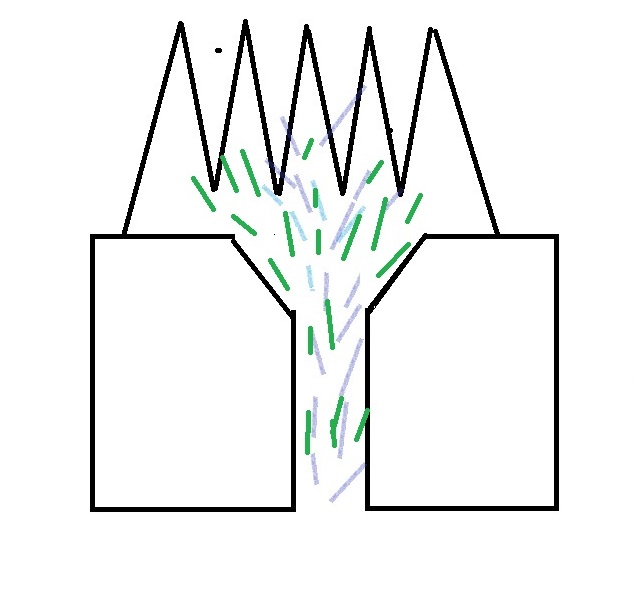
My 2p to add to DaveJ excellent modifications post. I always add a chamfer with a countersink bit to the central air hole. (Excuse the mucky base its the only loose base I could find that didnt have a build in)   My theory is with the standard air hole you only get airflow over the center of the coil.  Put a chamfer in and it opens out the airflow over more of the coil.  Its like engine tuning meets vaping lol.  |
|
bobby00
Full Member
  
Joined:June 2017
Posts: 119 
Location:
Likes: 61
Recent Posts
Last Online Jun 15, 2019 16:25:33 GMT
|
Post by bobby00 on Jul 13, 2017 20:26:28 GMT
I Drilled it out and widened the juice thingy's on the edge and coiled it (bloody tiny) very difficult to do filled it and its still hard work getting it to be open? I might attack it again with a 2.5 mm bit as it looks like its got room? I was also wondering about the wicking maybe thats causing it to be a tight draw as well? Also washed it but still a funny taste I might have to wash it in some cheap vodka of which I'm not keen a bit engine oily as you all pointed out? Never give up never surrender  |
|
phtumshk
Super Member
    
Joined:May 2014
Posts: 3,758 
Location:
Likes: 4,058
Recent Posts
Last Online Nov 15, 2024 13:54:05 GMT
|
Post by phtumshk on Jul 13, 2017 21:08:44 GMT
You can drill it as big as you like but its still only 2mm in the deck thats where the restriction is.
Wouldnt have thought it was down to too much wick.
|
|
buggritt
Super Member
    
Joined:February 2014
Posts: 1,399 
Location:
Likes: 884
Recent Posts
Last Online Apr 30, 2024 8:27:58 GMT
|
Post by buggritt on Jul 14, 2017 5:40:14 GMT
Or buy the daftly named Doggy Style, the cheapest one, from FT. Equal flavour to the Kayfuns, easy wicking and small. Paid about £6 for mine and use little else.
|
|
DaveJ
Super Member
     Wood Wizard of Oz
Locked down at home.
Joined:September 2016
Posts: 1,723 
Location:
Likes: 2,738
Recent Posts
Last Online Oct 31, 2024 3:07:26 GMT
|
Post by DaveJ on Jul 14, 2017 5:59:20 GMT
Something doesn't sound right to me. I wouldn't have thought wicking would make that much difference. You ought have seen a significant difference in draw after drilling the base out. Because I cannot think what else it could be, I am wondering if something is assembled mis-alligned? For example, there is a silicon/rubbery grommet that surrounds the centre "pole" ... the one that has the screw driver slot in the middle of the bottom 510 connector which extends upwards to the base of the coil deck. Has that grommet somehow been pushed around and is now filling/blocking the internal air holes in that vertical tube/pole/pipe? ** ELSE the Doggy Style does work!  |
|
morbidmatty
Full Member
  
Joined:March 2014
Posts: 113 
Location:
Likes: 83
Recent Posts
Last Online Sept 9, 2023 8:57:48 GMT
|
Post by morbidmatty on Jul 14, 2017 6:13:26 GMT
Bought my first Doggy Style (SXK) a few months ago after a recommendation from here I have retired my kayfuns and own 4 of these easy build and wick and I find flavour slightly better with these just make sure you get a few replacement tanks. SXK Doggy Style. LinkSpare tanks. link |
|
decoy
Super Member
    
Joined:February 2014
Posts: 4,119 
Location:
Likes: 3,118
Recent Posts
Last Online Apr 1, 2023 20:12:03 GMT
|
Post by decoy on Jul 14, 2017 6:33:01 GMT
owwww kfl,s thats a blast from thee past
loved the flavour but could not get on with the weeping of juice
you have done all the hard work and well done for not snapping the drill bit in the little suckker
strip it and chuck it in a glass of vodka overnight if the taste prevails(hark at me lol)
one thing that hasn't been mentioned is the center brass pin
when you take it out it has 2 small holes in it for air to enter these are by far the biggest prob on the kayfun
you can tickle them out a little but the bigger you make them the weaker the bolt(file the top n bottom of them with needle file)
the other thing to look for is when reassembling try to line the holes in center bolt up with the air hole on base(it do make some diff)
and as much as i cant stand the guy its were i 1st seen this way of wicking
it looks nuts it shouldn't work but it do
sorry but its a long time since i had a kfl so its what i can recall
kayfun 3 clones are cheap and good for mtl or if you want to go a bit more restrictive lung hit the kayfun v5 is worth a look and both are cheap on fast tech/gearbest/f3vape ect
hope that helps
|
|