The Kanger Subtank Mini Build Guide
Link to review Here
What you get:


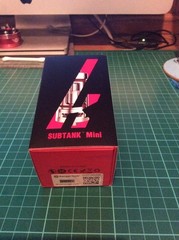
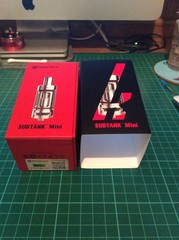
Inside the box:
The Tank, this comes with a 0.5 ohm OCC stock coil installed.

Underneath are the Accessories consisting of a spare glass tank, a full set of replacement O-rings, Muji cotton wick, a spare spaced 0.5 RBA deck coil, spare terminal screws, a 1.2 ohm OCC stock head, the important wee blue screwdriver and the RBA deck with a 0.5 ohm spaced coil installed.

First up building the RBA deck with a 0.5 ohm spaced coil wicked with Muji cotton.
Tools and equipment required:An ohm meter or a suitable mod
The blue wee screwdriver
A flat bladed jewellers screwdriver
Muji Cotton wick
A Phillips screwdriver
Scissors
0.4mm Kanthal A1 wire
www.cloud9vaping.co.uk/epages/yxve46fvrnud.sf/en_GB/?ObjectPath=/Shops/yxve46fvrnud/Products/DIY-WIRE/SubProducts/DIY-WIRE-A straightened paperclip

Making the coil:
Cut off approximately 4" of 0.4mm Kanthal and wrap around the shaft of the small blue screwdriver, keep the wire taught to the shaft as you wrap and you need 5 wraps spacing each wrap a mm or 2 apart, try and keep the wraps spacing relatively even. Each end of the wire should point in opposite directions.
It should now look something like this :

Next up with the coil still on the driver compress the coil against the shoulder of the screwdriver so all the wraps are touching then release, you do this easily with your fingers and may have to repeat once or twice. On release your looking for all the coils to equally spaced and not touching.
Here's the coil compressed, I'm only using pliers as it's easier to get a clear pic.

And after releasing straighten the legs with your fingers.

Here's the atty and an RBA section.

The RBA breaks down into 3 parts, the base, chimney and top cap. The base can be difficult to separate from the chimney, if you find this use the points of the scissors to locate in the juice channels from below and then twist off the chimney, remove the top cap from the chimney.

Screw the the base of the the RBA into the base of the atty securely.

And then screw the atty base into an ohm meter for stability.

Position the coil over the air hole whilst still on the blue screwdriver ensuring the coils legs are at the bottom.
With the screws loose position the first leg down the side of the first screw and tighten the screw down then secure the other leg. Once secure you can make minor adjustments to the coil position to ensure its central and directly over the air hole by moving the screwdriver.

Wiggle the spare Kanthal legs to ensure a neat break, remove the screwdriver and then check the resistance of your coil, you should get 0.5 ohms. You may wish to fire the coil on a mod at this point to check for hot spots and even heating of the coil.

Cut a strip of the Muji cotton about 5mm wide for highish VG juice or 7mm wide if you use high PG juice.

Moisten one end of the cotton and screw to a point.

Place the pointed tip of the cotton into the coil.

Then pull it gently through the coil trying not to distort the coil, you need to be gentle here. If you notice the coils are now touching you can ease then apart again to ensure they are evenly spaced and not touching with a flat bladed jewellers screwdriver.

Pull the two tails of the wick up vertically and slide the chimney over the wicks and screw the chimney down firmly.

Cut the wicks to length at about 5mm above the top of the chimney.

Using the jewellers screwdriver curve the end of each wick down against the inside wall of the chimney until the end of each wick is down on the RBA deck. Try and keep the wick fluffy and spread it out across the whole width of the deck.

Now juice up the wick ensuring you soak the whole of the wick including and especially under the coil.
using the end of a straightened paperclip ease the wick on the deck either side away from the juice channels so you can see the juice channels clearly.
This is important. 
Here you can clearly see the exposed juice channels either side.

Screw on the RBA section top cap securely.

Juice time, invert the tank and squeeze juice in between the Central air tube and the the glass tank until the juice level is just below the top of the air tube.


With the tank still inverted, invert the base complete with the RBA section and after locating the RBA hole on the tank air tube screw the two parts together securely.

Full tank, leave it stand upright for 5 minutes, set the airflow to your preferred position, single hole, dual hole or full bore open and your ready to go.

Here's a Riptrippers video of the above method
Don't really see the point in rebuilding the OCC heads given the RBA deck gives a better vape and is less fiddly to coil but for those who wish to here's another video on the OCC head rebuild.