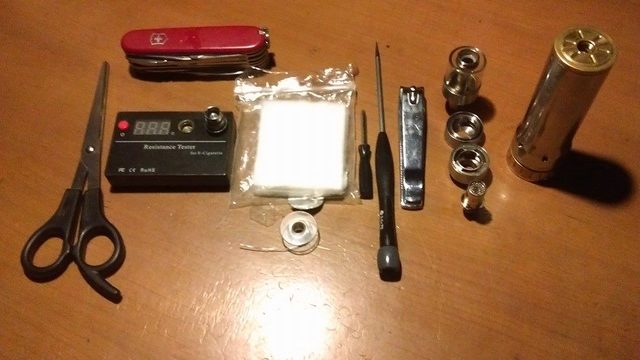
Tools and materials I used for the job:-
Scissors
Resistance tester
Muji cotton
Swiss army knife
Small black phillips screwdriver (3mm)
Larger black flat head screwdriver (3mm)
Nail clippers
Kanthal wire (25AWG)
Mod for test firing your coil (Hades 26650 clone)
Also used a very small flathead screwdriver for working my wick (not pictured here)

First job is to remove the old cotton from the head. This can be a bit tricky as it's really stuffed in there. Get a pair of tweezers (swiss army knife) and start pulling it out a few strands at a time.

When you've loosened it enough grab between finger and thumb and pull it all out.
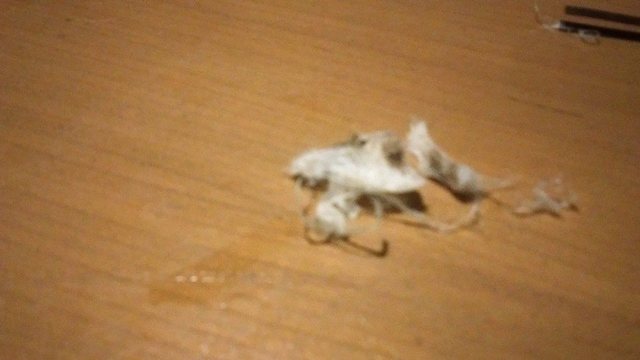
And there it is... quite grotty and that was only after a few tanks through it.

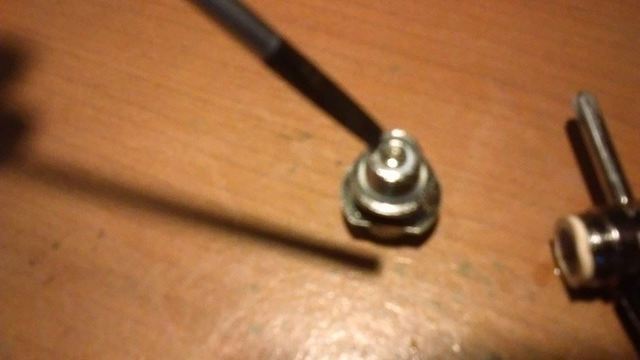
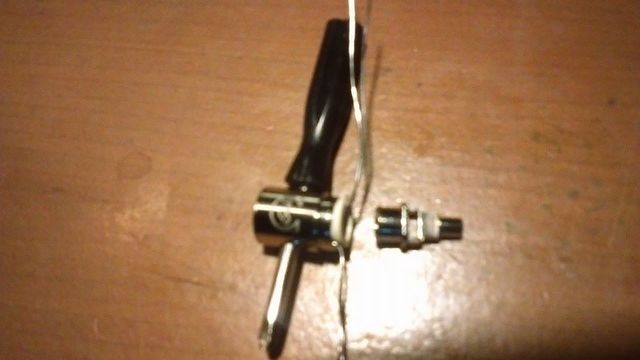
Next get your little screwdriver and thread it through the old coil.
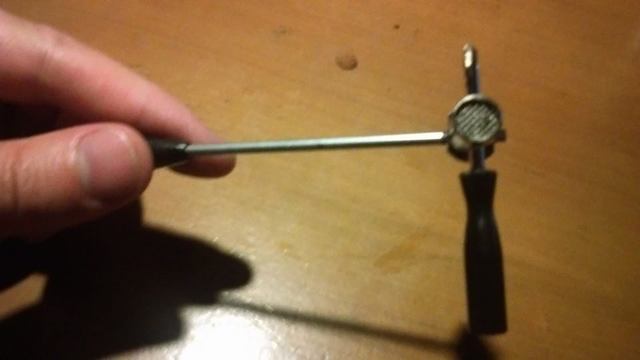
Then get the second larger screwdriver and thread through the gap at the bottom. In this instance I could only fit the flat headed portion in there but that was sufficient to get the purchase needed in the next step.
Now comes the key step to getting these little babies apart (they are press fitted hence why a lot of people assume these heads are not rebuildable) Just work the two screwdrivers in opposite directions, out and then back in. After doing this a few times the press fitting should loosen sufficiently for you to pop the two section apart.

Voila!
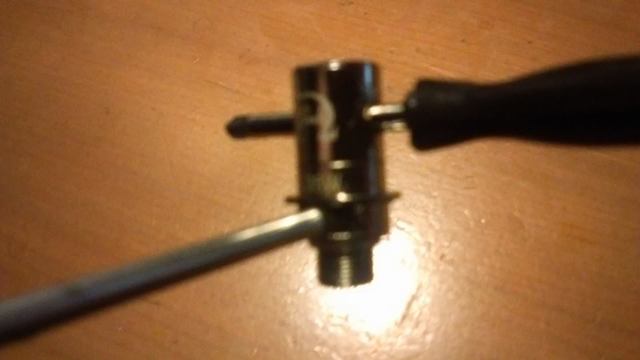
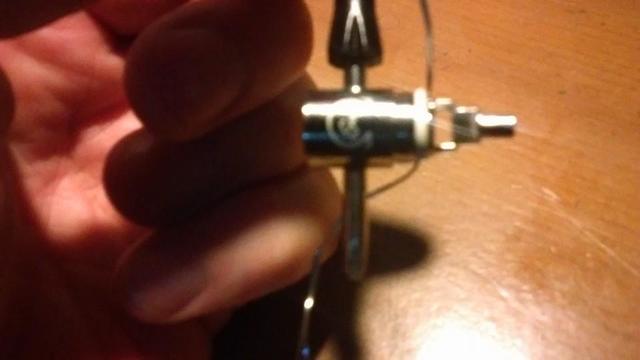
Turn the bottom of the two pieces upside down and then use a screwdriver or similar pointy object to push out the pin indicated in the picture. Its housed inside a rubber insulator piece and slides out quite easily.
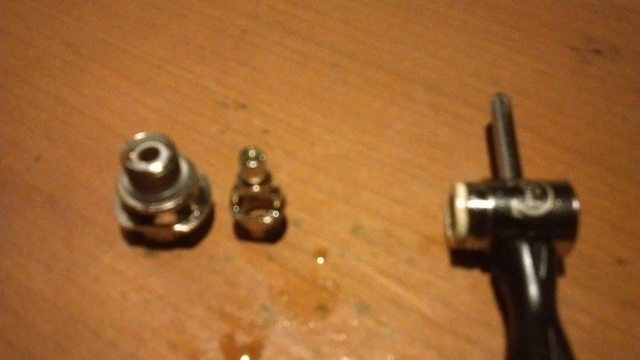
Here you can see it after I pushed it out.

Next take the top of the two bits you pulled apart, remove the screwdriver that was through the coil, and take the rubber grommet out.
Then the old coil will come out with it. The one I pulled out was little bit gunked up as you can just about see from my slightly poor quality phone pics.
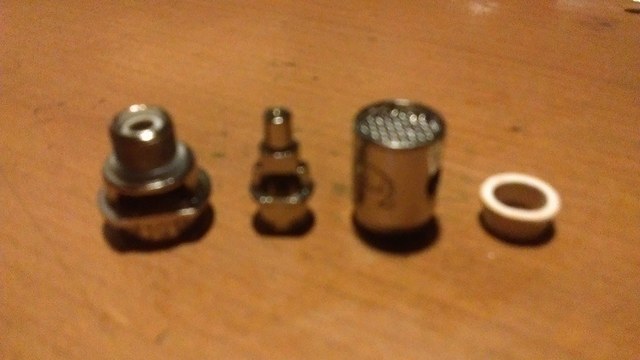
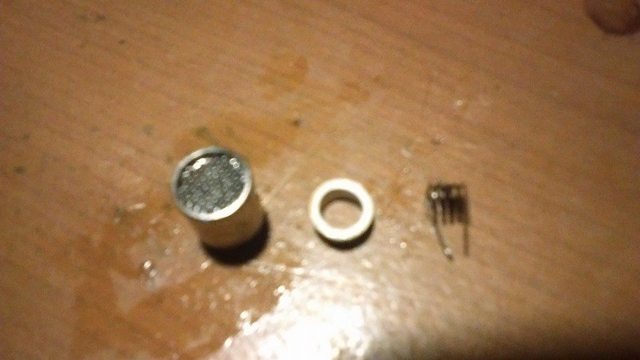
Now you will be left with 4 parts. Give them all a really good rinse out under some warm water and dry them as best you can. I will name them parts A B C & D as you see them left to right in the picture.
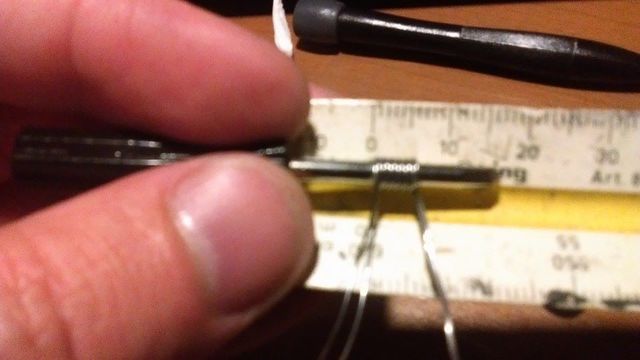
Now time to build a coil. I won't go into detail about how to do this as there's already plenty of guides on that. For my build I went for a parallel coil. 6 wraps around the little black 3mm screwdriver.
As you can see from the pic my coil was about 5mm in length which is about the limit you will be able to fit in. The more wraps you can get in the better though as you will get better flavour with the increased surface area.
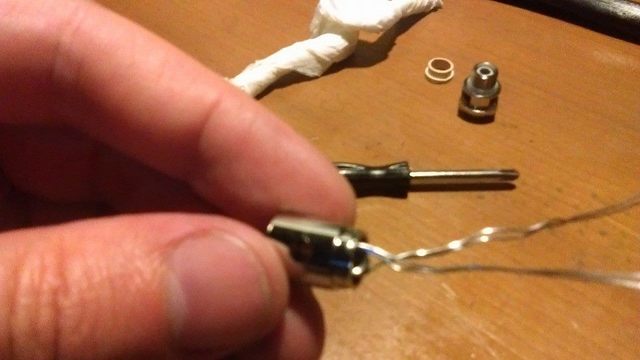
Take your coil and insert into part C from the bottom. Inserting from the bottom means you don't have to remove the mesh spit guard on the top. This can be removed with a pin or something to pick it out but I've found it best to leave alone otherwise it will get damaged and not work as well.

Line the coil up with the two holes and then put your screwdriver back trough the coil to hold it in place.
From now on is very similar to rebuilding a protank coil if you've ever done one of them...
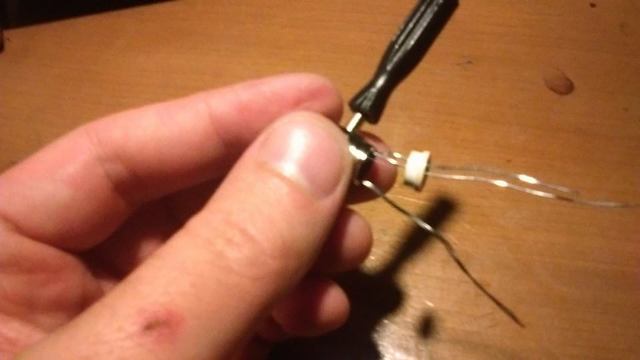
Thread the rubber grommet (part D) over one of the coil legs (or one of the sets of legs in my case since i'm using a parallel coil)
Then push the grommet back into place. One coil leg should be through the grommet and the other on the outside of it, pushed up against the metal.
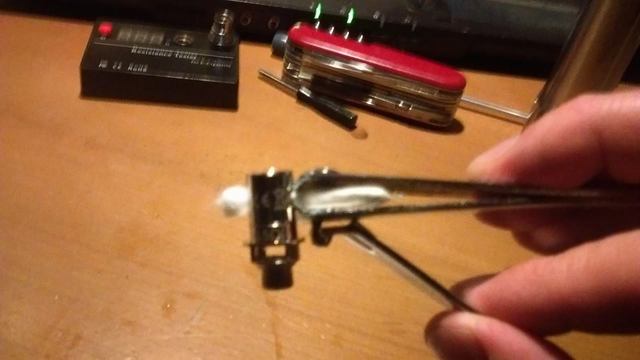
Next after making sure your coil is nicely in place and centralised, take the 510 pin (part B) and insert into the rubber grommet, one of the coil legs should then be trapped between part B and part D, the other coil leg just bent to the side.
This bit can be a bit tricky, especially when using quite thick wire like I did.
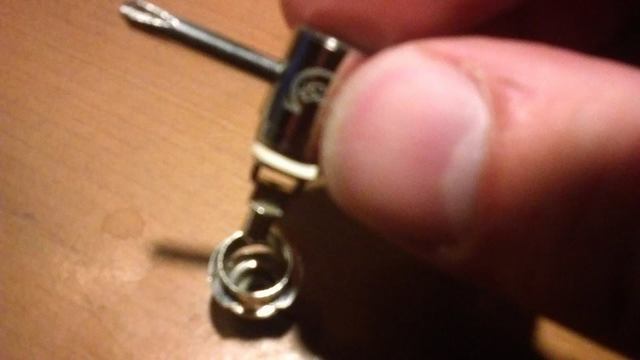
Make sure you line it up as you can see in my pic, with the hole in the bottom of part B facing up at a 90 degree angle to the other two holes in part C.
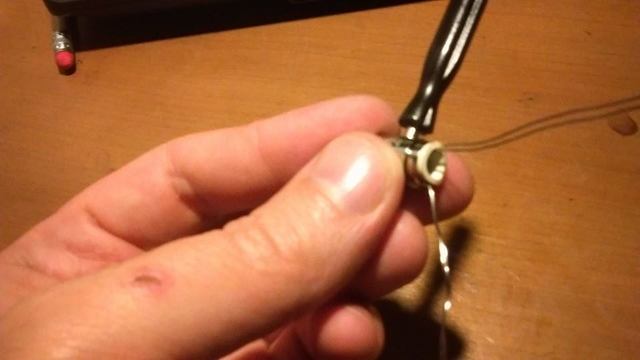
Here you can see it pushed all the way home and lined up correctly.
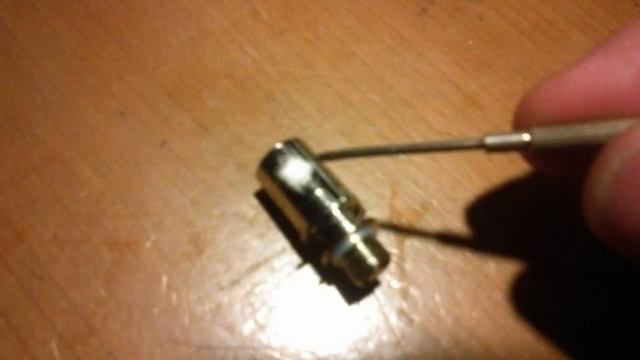
Once your happy all is good you can snip your excess coil legs.
Now insert the two pieces you just pushed together into part A. The pin on the bottom will slide back into the rubber insulator.

You will only be able to push it in so far by hand. Just line it up as straight as you can so the screwdriver is parallel with the flat edge of part A.

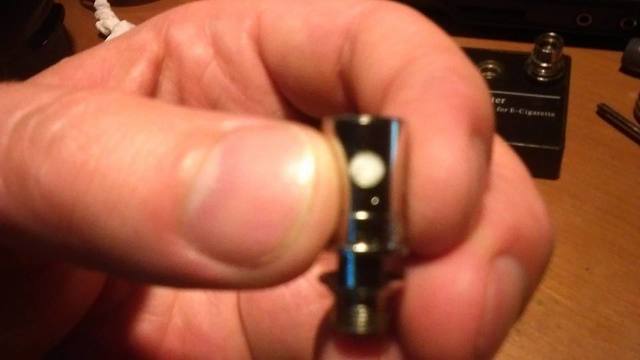
Now take a solid item with a bit of weight to it (I used my swiss army knife), and apply gentle but firm pressure to one of the ends of the coil head until it all pushes back together and lines up nicely.

Now check your build on a resistance tester to make sure you don't have any shorts. One of the beauties of these isub coils is that they have the 510 connection built in and you can screw them straight on to a resistance tester as you can see in the pic.
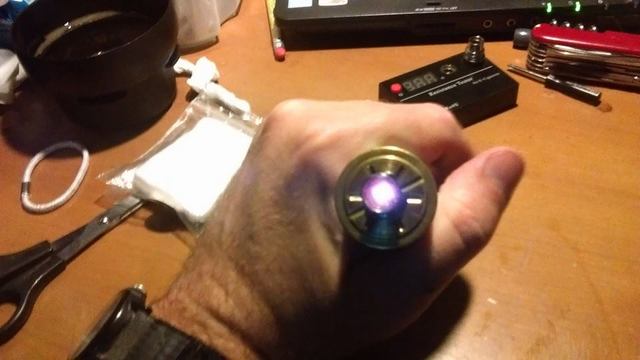
Once your happy that all is well with your coil you can screw it straight onto a mod and get it fired up.
Make sure it's all glowing nice and evenly and if not you can prod in a bit with a flat head screwdriver through the holes on each side. Obviously don't do this at the same time as firing your mod.
After this step check your coil resistance one more time
Now it's time for wicking. I used Muji cotton.
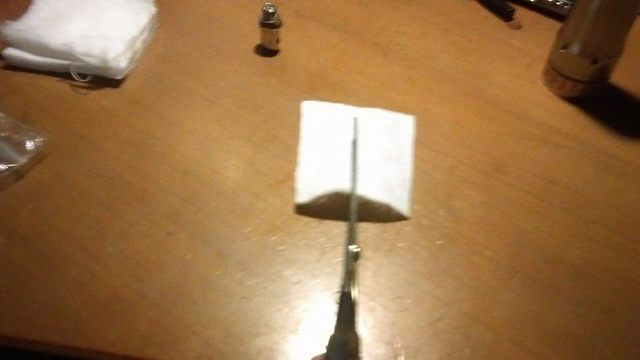
I find that i'm able to peel each pad into 4 separate layers. Take just one of those 4 layers and cut it in half as in the picture (with the grain not against it).
Don't be scared to use the outside layers that are a little bit tougher. These will wick just as well IMO.

Then take one of those halves and cut it in half again (this time against the grain). Leaving you with two nice square shaped muji layers.
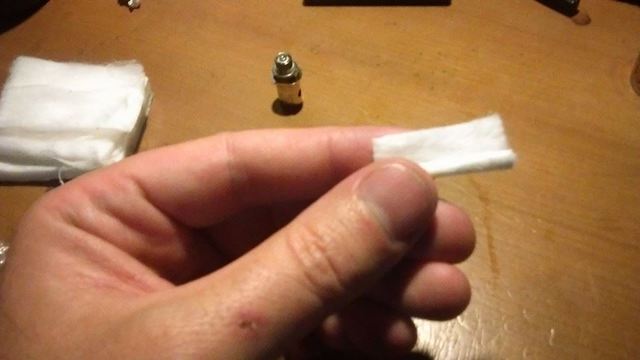
Take one of those squares and roll it up like a rollie (as an ex roll up smoker this bit comes instinctively for me)
Not too loose and not too tight 
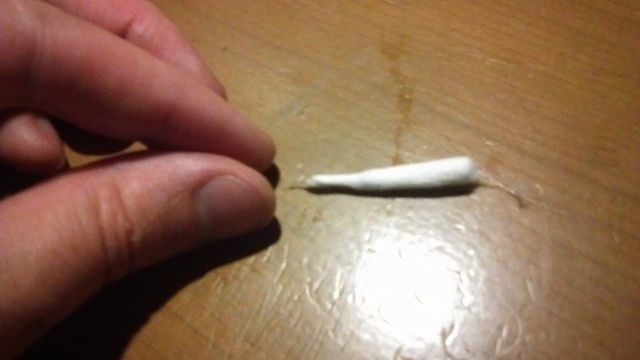
Once rolled up take one of the ends, pinch firmly and roll it up tight to make it easier to thread through your coil.
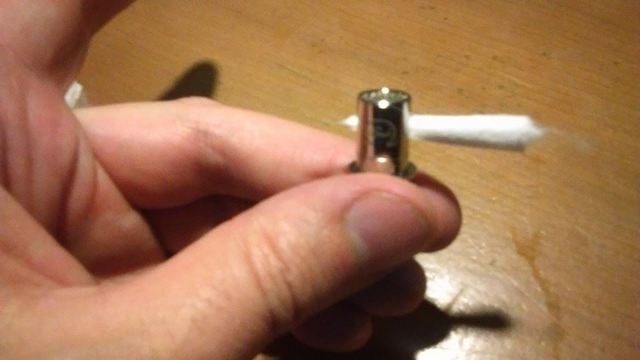
Thread your wick through the coil like so...

Pull your wick through until it's nice and snug in there. Just like wicking any other coil really you want to make sure the wick can slide through freely but not overly loose.
Now take your nail clippers and clip off the excess wick. Leave about half a mm or less sticking out one each side.
Using a small flat headed screwdriver tuck any stray cotton fibres back inside the body until the wick is flush.
You want it nice and flush as in my picture here. Otherwise your wick will get pulled about and moved out of place when inserting it into your tank.

And there you have it. Get it nicely primed up and stick it back in your tank.
If you get these steps right it should work a beauty! 

Clouds

One cinema screen.

Slightly obscured.

Completely obscured
Have fun!