Gordy
Super Member
    
Joined:September 2011
Posts: 11,515 
Location:
Likes: 100
Recent Posts
Last Online Feb 15, 2013 0:28:19 GMT
|
Post by Gordy on May 15, 2012 2:28:41 GMT
Nice videos there Des... cheers for taking the time... looks like we have our very own forum reviewer  |
|
maccafan
Super Member
    
Joined:May 2012
Posts: 6,278
Location:
Likes: 469
Recent Posts
Last Online Nov 3, 2022 10:25:09 GMT
|
Post by maccafan on May 15, 2012 11:37:49 GMT
Using the one that works since yesterday..
No gurgles.
Pros:
Nice vape and flavour.
Looks good on a ego
Good vape and flavour
No leaks. Bottom appears completely sealed and O rings doing the job of keeping the liquid inside.
Tube is sturdy and flexible..So think it will not crack easily.
Doddle to fill.
Easy to take apart and clean.
Cons:
Draw is tight. Not as bad as the stardust but relies on the same airholes/notches as the stardust so RIVA users will experience a tighter draw.
Threaded collars seem stuck to the inner tube with super glue. Not too sure what glue has been used but haven't seen any juice seep into this area yet.
Drip tip stopper does not completely stop the juice from seeping into the drip tip well well..But is well contained including the condensation..
Middle post is very loose..Could have been better located into the base with bigger a silicone sleeve. Keeps moving around when filling and could cause loss of contact.
Things I need to check:
Cannot easily put a new coil in as it is soldered to the base contact plate on the post and the coil resides within the center post. Looks like the coil is vertical.With a bit of lead free/silver solder should be possible. May also be possible to wind some wire around the bottom contact plate legs and replace it that way
Only part of the wick may be replaceable. Need to check that too.
All in all not a bad clearo but can do with mainly improving the fit of the center post
|
|
womble
Super Member
    
Joined:August 2011
Posts: 3,221
Location:
Likes: 712
Recent Posts
Last Online Jul 8, 2016 23:24:58 GMT
|
Post by womble on May 15, 2012 11:49:19 GMT
Middle post is very loose..Could have been better located into the base with bigger a silicone sleeve. Keeps moving around when filling and could cause loss of contact. That could be the reason for so many DOA then. I was looking at the Ukvapers forum and there seems to be just as many problems there as here. |
|
maccafan
Super Member
    
Joined:May 2012
Posts: 6,278
Location:
Likes: 469
Recent Posts
Last Online Nov 3, 2022 10:25:09 GMT
|
Post by maccafan on May 15, 2012 12:07:25 GMT
That could be the reason for so many DOA then. I was looking at the Ukvapers forum and there seems to be just as many problems there as here. It is the problem.. |
|
blakey
Super Member
     Ninja Maestro
Joined:June 2011
Posts: 9,206 
Location:
Likes: 4,242
Recent Posts
Last Online Nov 22, 2024 19:52:52 GMT
|
Post by blakey on May 15, 2012 12:15:48 GMT
That could be the reason for so many DOA then. I was looking at the Ukvapers forum and there seems to be just as many problems there as here. It is the problem.. Macca, mine have come but delivered to work so I won't get them till tomorrow, can the center post be dis-assembled to allow you to gain access to the point that the coil is soldered? I'm thinking that it's only the positive connection that's made at the base and the negative is made to the tube itself? |
|
maccafan
Super Member
    
Joined:May 2012
Posts: 6,278
Location:
Likes: 469
Recent Posts
Last Online Nov 3, 2022 10:25:09 GMT
|
Post by maccafan on May 15, 2012 12:24:20 GMT
Macca, mine have come but delivered to work so I won't get them till tomorrow, can the center post be dis-assembled to allow you to gain access to the point that the coil is soldered? I'm thinking that it's only the positive connection that's made at the base and the negative is made to the tube itself? The bottom of the center post is a thin gold washer with legs which is pushed into a silicone washer with two small slits that insulates it from the post. If you lever it with a fine screwdriver you can actually pull the wire and solder out through the slits in the silicone..That's as far as I got. Haven't seen how the ground connection is made inside yet. As far as I have seen, I think I can change the coil and wick very easily on it even if it resides within the tube without any solder. Need to check out what's inside the tube before I can confirm. |
|
blakey
Super Member
     Ninja Maestro
Joined:June 2011
Posts: 9,206 
Location:
Likes: 4,242
Recent Posts
Last Online Nov 22, 2024 19:52:52 GMT
|
Post by blakey on May 15, 2012 12:43:20 GMT
Macca, mine have come but delivered to work so I won't get them till tomorrow, can the center post be dis-assembled to allow you to gain access to the point that the coil is soldered? I'm thinking that it's only the positive connection that's made at the base and the negative is made to the tube itself? The bottom of the center post is a thin gold washer with legs which is pushed into a silicone washer with two small slits that insulates it from the post. If you lever it with a fine screwdriver you can actually pull the wire and solder out through the slits in the silicone..That's as far as I got. Haven't seen how the ground connection is made inside yet. As far as I have seen, I think I can change the coil and wick very easily on it even if it resides within the tube without any solder. Need to check out what's inside the tube before I can confirm. So if I make a coil with no resistance wire attached to the ends I can then make a spring on the negative end that will force itself against the side of the tube to maintain its contact as well as hold the wick in place and the other end can be trapped at the base for the positive connection? |
|
|
|
Post by Sandra (aka Chillax) on May 15, 2012 12:47:50 GMT
Great vids there Des, I really enjoyed watching them, you should do more, especially as we know and trust your opinion, dont let it be your last #KissBlowSmiley1# I didn't buy one but was very interested in them. Hope the problem gets sorted
|
|
maccafan
Super Member
    
Joined:May 2012
Posts: 6,278
Location:
Likes: 469
Recent Posts
Last Online Nov 3, 2022 10:25:09 GMT
|
Post by maccafan on May 15, 2012 12:54:55 GMT
That is what I was thinking for a positive connection..Drop the solder and thread a piece of nickel no resistance wire through the slit in the silicone base washer and bend it and then put the gold washer plate on top trapping it..
As for the ground, what you say sounds feasible but need to look what's inside the tube for how the coil is prevented from touching the sides..May be a sleeve of some kind..I need to take the inner post apart and do a replacement coil and wick before I can advise.
May also be possible to use the stardust center pin and the hard and soft sleeves and have a stardust coil kind of arrangement..The post looks about the right length and diameter..There are multiple possibilities..
It is a modders clearo, that's for sure..
|
|
|
|
Post by Batdragon (AKA Batty) on May 15, 2012 12:56:30 GMT
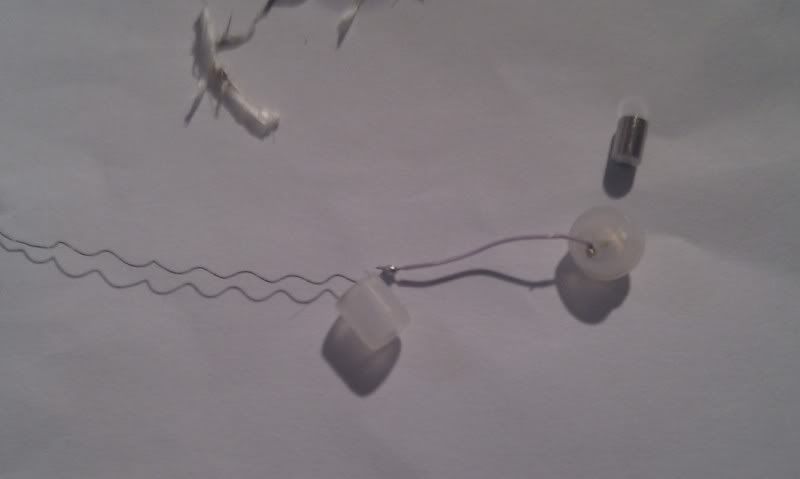
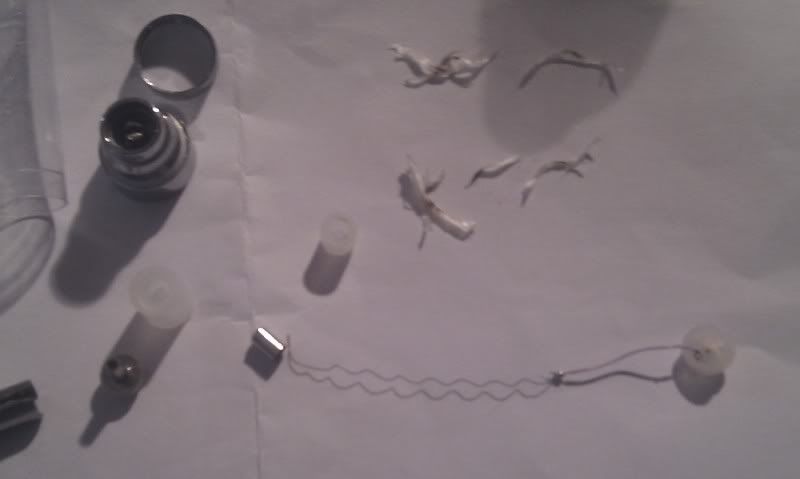
I have just taken mine fully apart. like Macca said the brass cap comes off easily from the silicon grommet. There is a wire that goes from that up to the coil and is soldered on to it. the coil goes through another silicone crommet which has a inner metal sleve like the nozzel at the top. The coil is then wrapped around some of the wicking material and then is folded back over and is caught between the silicone and the outer tube. (picture coming) My coil came in 2 bits so am guessing that is why it measured open circuit. they look very easy to re coil and wick. I am tempted to do it but will have to sort out the issue with the clear tube first as the screw threaded parts that are glued, have come away with the ends.    |
|
maccafan
Super Member
    
Joined:May 2012
Posts: 6,278
Location:
Likes: 469
Recent Posts
Last Online Nov 3, 2022 10:25:09 GMT
|
Post by maccafan on May 15, 2012 13:27:55 GMT
Looking at those pictures your coil is still in one piece..The unsoldered end of the coil probably loops around the silicone inner sleeve insulator and touches the inner wall of the center post. The weak point is definitely the gold colour plated washer at the bottom.
Like I suspected it looks like it is a vertical coil with the wicks unbraided at the top and split in two and put into the slot to wick either side. Not too sure what that little metal sleeve on the bottom right of the third piccy does does. I'll have a look when I get back from work.
|
|
|
|
Post by Batdragon (AKA Batty) on May 15, 2012 13:50:30 GMT
That coil is from my working one. I thought that if I can see how it is put together when it works, I will be able to fix the broken ones. The broken ones has the end snapped off.
I'll take another one apart more gently now and show you what that metal sleeve does. It basically sits inside the silicone sleeve with the coil wire ciming up through the center. the coil then goes around the wick which sticks out both sides like a tash.
|
|
maccafan
Super Member
    
Joined:May 2012
Posts: 6,278
Location:
Likes: 469
Recent Posts
Last Online Nov 3, 2022 10:25:09 GMT
|
Post by maccafan on May 15, 2012 13:52:34 GMT
Ah ok..It's a stiffener inside the sleeve insulator to keep the coil centered in the post.
Thanks..Saved me taking mine apart..
|
|
|
|
Post by Batdragon (AKA Batty) on May 15, 2012 14:03:47 GMT
|
|
|
|
Post by Perpetua on May 15, 2012 14:05:54 GMT
Have sent mine back to Chris today, got enough stuff that requires faddling.  And instead, cracked open one of Clockworks great 3.5ml clearo tanks, perfick on the Argento Mini.  |
|